


Understanding Drywall Cracks in Your Living Room
Common Causes of Cracked Drywall
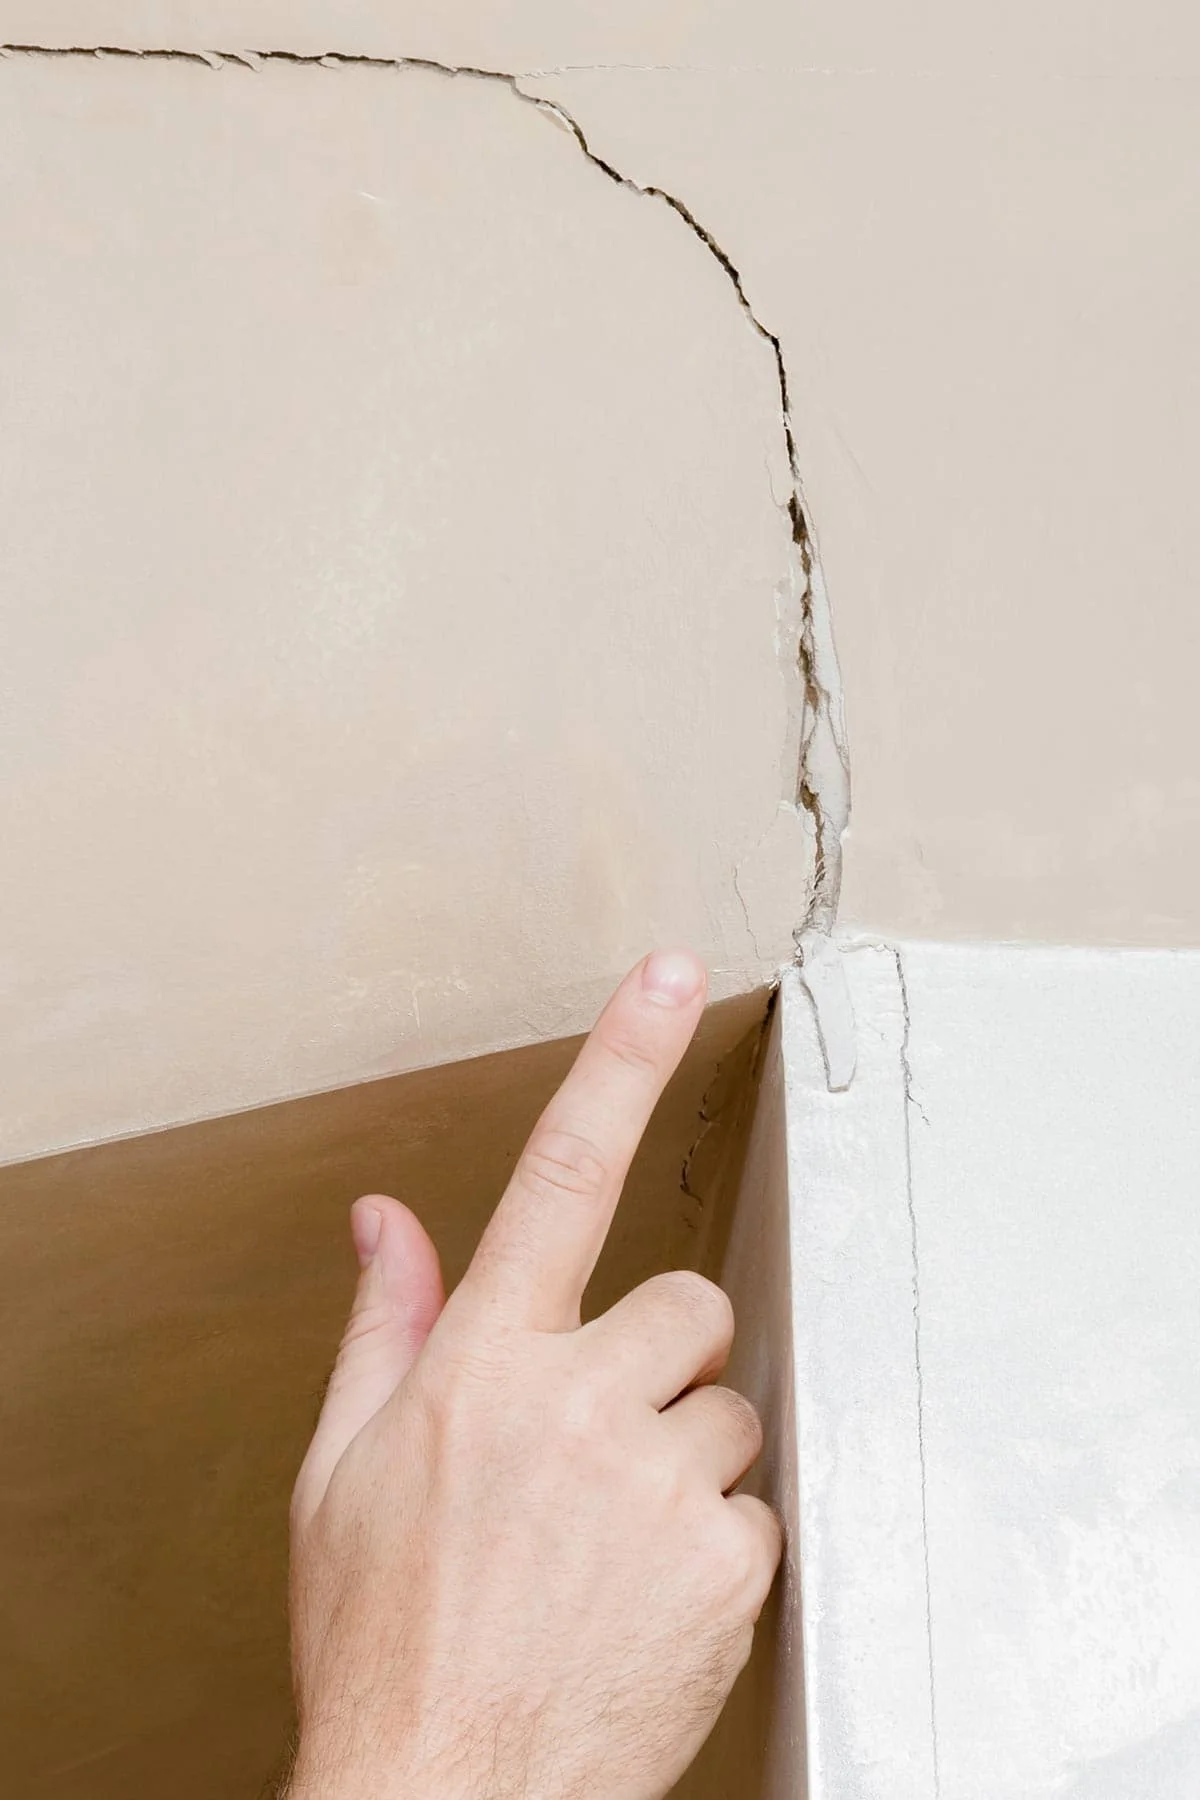
Drywall cracks in your living room can be frustrating and detract from the overall appearance of your home. These cracks often occur due to a variety of underlying issues. One common cause is the natural settling of your house, especially in new constructions where materials adjust over time. Temperature and humidity fluctuations can cause the drywall and framing materials to expand and contract, leading to stress and eventual cracking. Other causes include poor installation practices, where drywall sheets were not properly secured or joints not adequately taped, as well as water damage from leaks or high moisture levels which weaken the drywall structure.
Types of Cracks and Their Severity
Not all drywall cracks are created equal, and understanding the type and severity is key to choosing the right repair method. Hairline cracks are usually superficial and caused by minor expansion or shrinkage; these can often be repaired quickly without major work. Larger, jagged cracks might indicate structural movement or more serious issues such as foundation settling or wall framing problems. Vertical or stair-step cracks near corners and door frames may suggest ongoing building movement that could require further inspection. Recognizing the difference between cosmetic and structural cracks helps determine if a simple fix or professional intervention is needed.
Essential Tools and Materials Needed for Drywall Repair
Choosing the Right Patching Compound
Selecting the appropriate patching compound is crucial for a durable, long-lasting drywall repair. Lightweight joint compound is suitable for minor hairline cracks and small holes but may require several coats and longer drying times. Quick-set mud, on the other hand, offers the advantage of setting rapidly and drying hard, allowing you to apply multiple layers in one day. For larger cracks or holes, using a patch combined with fiber mesh tape ensures a strong bond and prevents future cracking. Matching the drywall thickness when cutting patches ensures smooth integration with the existing surface.
Safety Equipment and Preparation Supplies
Working with drywall dust and debris can pose health risks, making safety equipment essential. Protective clothing, gloves, goggles, and a dust mask shield you from inhaling dust and irritants during sanding and cutting. Using plastic sheeting or drop cloths protects your floor and furniture from dust and compound splatters. Before starting, gather all necessary tools like drywall knives, sanding blocks, and fasteners to maintain an efficient workflow. These precautions help you avoid accidents and keep the workspace clean.
Preparation Before Starting the Repair
Clearing the Area and Protecting Furniture
Before repairing the cracked drywall, it’s important to prepare your living room space thoroughly. Remove furniture or move it to the center of the room and cover with protective sheets to guard against dust and debris. Using a plastic drop cloth on the floor prevents damage from joint compound spills and sanding dust. Clearing the area not only safeguards your belongings but also gives you ample room to work comfortably and maneuver tools safely.
Cleaning and Inspecting the Damaged Surface
Proper preparation of the damaged drywall surface is key to a successful repair. Begin by cleaning the cracked area with a damp cloth to remove dust, loose debris, or flaking paint. Inspect the crack to determine if it is shallow and minor or deep and extensive; this evaluation helps decide whether a simple filling or patching is necessary. If the crack is accompanied by moisture or soft drywall sections, address the underlying moisture problem before proceeding. A stable and clean surface ensures the patching compound adheres properly and results in a smooth finish.
Step-by-Step Drywall Crack Repair Process
Step 1: Widen and Clean the Crack
Start the repair by widening the crack slightly using a utility knife or drywall saw. This may seem counterintuitive, but creating a clean and slightly larger groove allows the patching compound to bond better. Remove any loose drywall material inside the crack and clean the area thoroughly. If the crack runs along a joint, check and remove any damaged tape or compound. Making the edges smooth and dust-free prepares the surface for the next step.
Step 2: Apply Joint Compound or Patch
For hairline or minor cracks, apply a layer of joint compound using a drywall knife, pressing lightly to fill the crack completely. For wider cracks or holes, place fiber mesh tape over the area and cover it with quick-set mud, pressing firmly to embed the tape and smooth the compound. If using a patch, cut it to fit precisely and attach it with drywall screws spaced about six inches apart into wooden backing behind the drywall. Backfill any gaps with compound before taping seams. Applying multiple thin coats rather than one thick layer reduces shrinkage and cracking.
Step 3: Sanding and Smoothing the Surface
Once the compound is fully dry, sand the repaired area gently with fine-grit sandpaper to create a smooth, flush surface. Apply light pressure and use a sanding block to avoid damaging the edges of the patch or surrounding wall. Feathering the edges by increasing the pressure and adjusting the angle of your drywall knife during compound application helps minimize visible seams. Proper sanding ensures the repair blends seamlessly with the rest of the wall.
Step 4: Priming and Painting to Match Your Wall
After sanding, clean away dust using a damp cloth and allow the area to dry completely. Apply a primer specially formulated for drywall repairs to seal the patched area, particularly if you plan to use semi-gloss or shiny paint finishes. This step promotes even paint coverage and prevents noticeable color differences. When the primer dries, repaint the entire wall or just the repaired section depending on color match and wall condition. This final step restores your living room wall to a flawless appearance.
Tips for Preventing Future Drywall Cracks
Maintaining Proper Humidity Levels
Fluctuations in indoor humidity can cause drywall and framing materials to expand and contract, leading to cracks over time. Using a humidifier or dehumidifier to maintain consistent humidity levels around 30-50% helps minimize this movement. Proper ventilation in your living room also reduces the risk of moisture buildup, especially in areas prone to dampness. Keeping the environment stable helps prolong the integrity of your drywall.
Structural Inspection and Reinforcement Advice
Repeating cracks may indicate underlying structural issues such as foundation settling or loose framing. Periodically inspect your living room walls and ceilings for signs of movement or damage. Reinforcing the drywall with additional wood backing and securing screws at regular intervals around patches reduces movement and future cracking. If you notice persistent or widening cracks, consult a structural expert to assess and address any deeper problems before they worsen.
When to Call a Professional for Drywall Repair
While many drywall repairs can be handled by a skilled DIYer, some situations warrant professional expertise. Extensive cracks, water damage, mold growth, or visible structural issues require the attention of a qualified contractor. Professionals can provide comprehensive assessments, structural reinforcements, and high-quality finishes that may be difficult to achieve alone. Additionally, if you lack the proper tools or safety equipment, hiring a pro ensures the job is done efficiently and safely, saving you time and potential costly mistakes.


")


