


Understanding Drywall Damage from Picture Frames
Common Causes of Holes Behind Picture Frames
Holes in drywall behind picture frames often result from various mounting methods. Nails, screws, or hooks used to hang frames can create small punctures. Over time, shifting frames or removing them without care can enlarge these holes. Sometimes, heavier frames cause drywall to crack or crumble around the fastener due to weight stress. Understanding these causes helps in selecting the right repair approach.
Assessing the Size and Severity of the Damage
Before starting repairs, it’s important to measure the hole size and inspect the surrounding drywall condition. Small holes, typically under a half-inch, can be easily filled with spackle or putty. Larger holes or those with damaged edges may require a drywall patch. Assessing severity prevents underestimating the repair needed and ensures a durable fix.
Essential Tools and Materials for Drywall Repair
Gathering Your Repair Kit
Having the right tools at hand simplifies the repair process. Essential items include spackle or joint compound, a putty knife, sanding block, primer, and matching paint. For larger holes, a drywall patch or mesh tape and a utility knife are necessary. Preparing all materials beforehand helps avoid interruptions during the repair.
Choosing the Right Patch or Filler
Selecting the appropriate filler depends on the hole size and finish desired. Spackle works well for small pinholes and minor dents, offering quick drying time. Joint compound is better suited for larger repairs due to its durability and smooth finish. For bigger holes, self-adhesive drywall patches provide structural support and ease application.
Preparation Before Repairing Drywall Holes
Clearing the Area Safely
Begin by removing the picture frame and hardware gently to prevent further damage. Clear surrounding objects and cover the floor with a drop cloth to catch debris. Ensuring a clean and safe workspace is critical to avoid accidental damage or injury during repair.
Cleaning and Smoothing the Hole’s Edges
Next, inspect the hole edges and trim any loose or jagged drywall pieces using a utility knife. Cleaning the area removes dust and debris that can affect adhesion. Smoothing the edges creates a better surface for applying filler or patch material, promoting a seamless repair.
Step-by-Step Drywall Hole Repair Process
Small Holes: Using Spackle or Putty
For small holes, apply a small amount of spackle using a putty knife. Press the filler into the hole and smooth it flat against the wall. Avoid overfilling to prevent smothering the area. Let it dry thoroughly, then sand lightly to blend the surface with the surrounding wall.
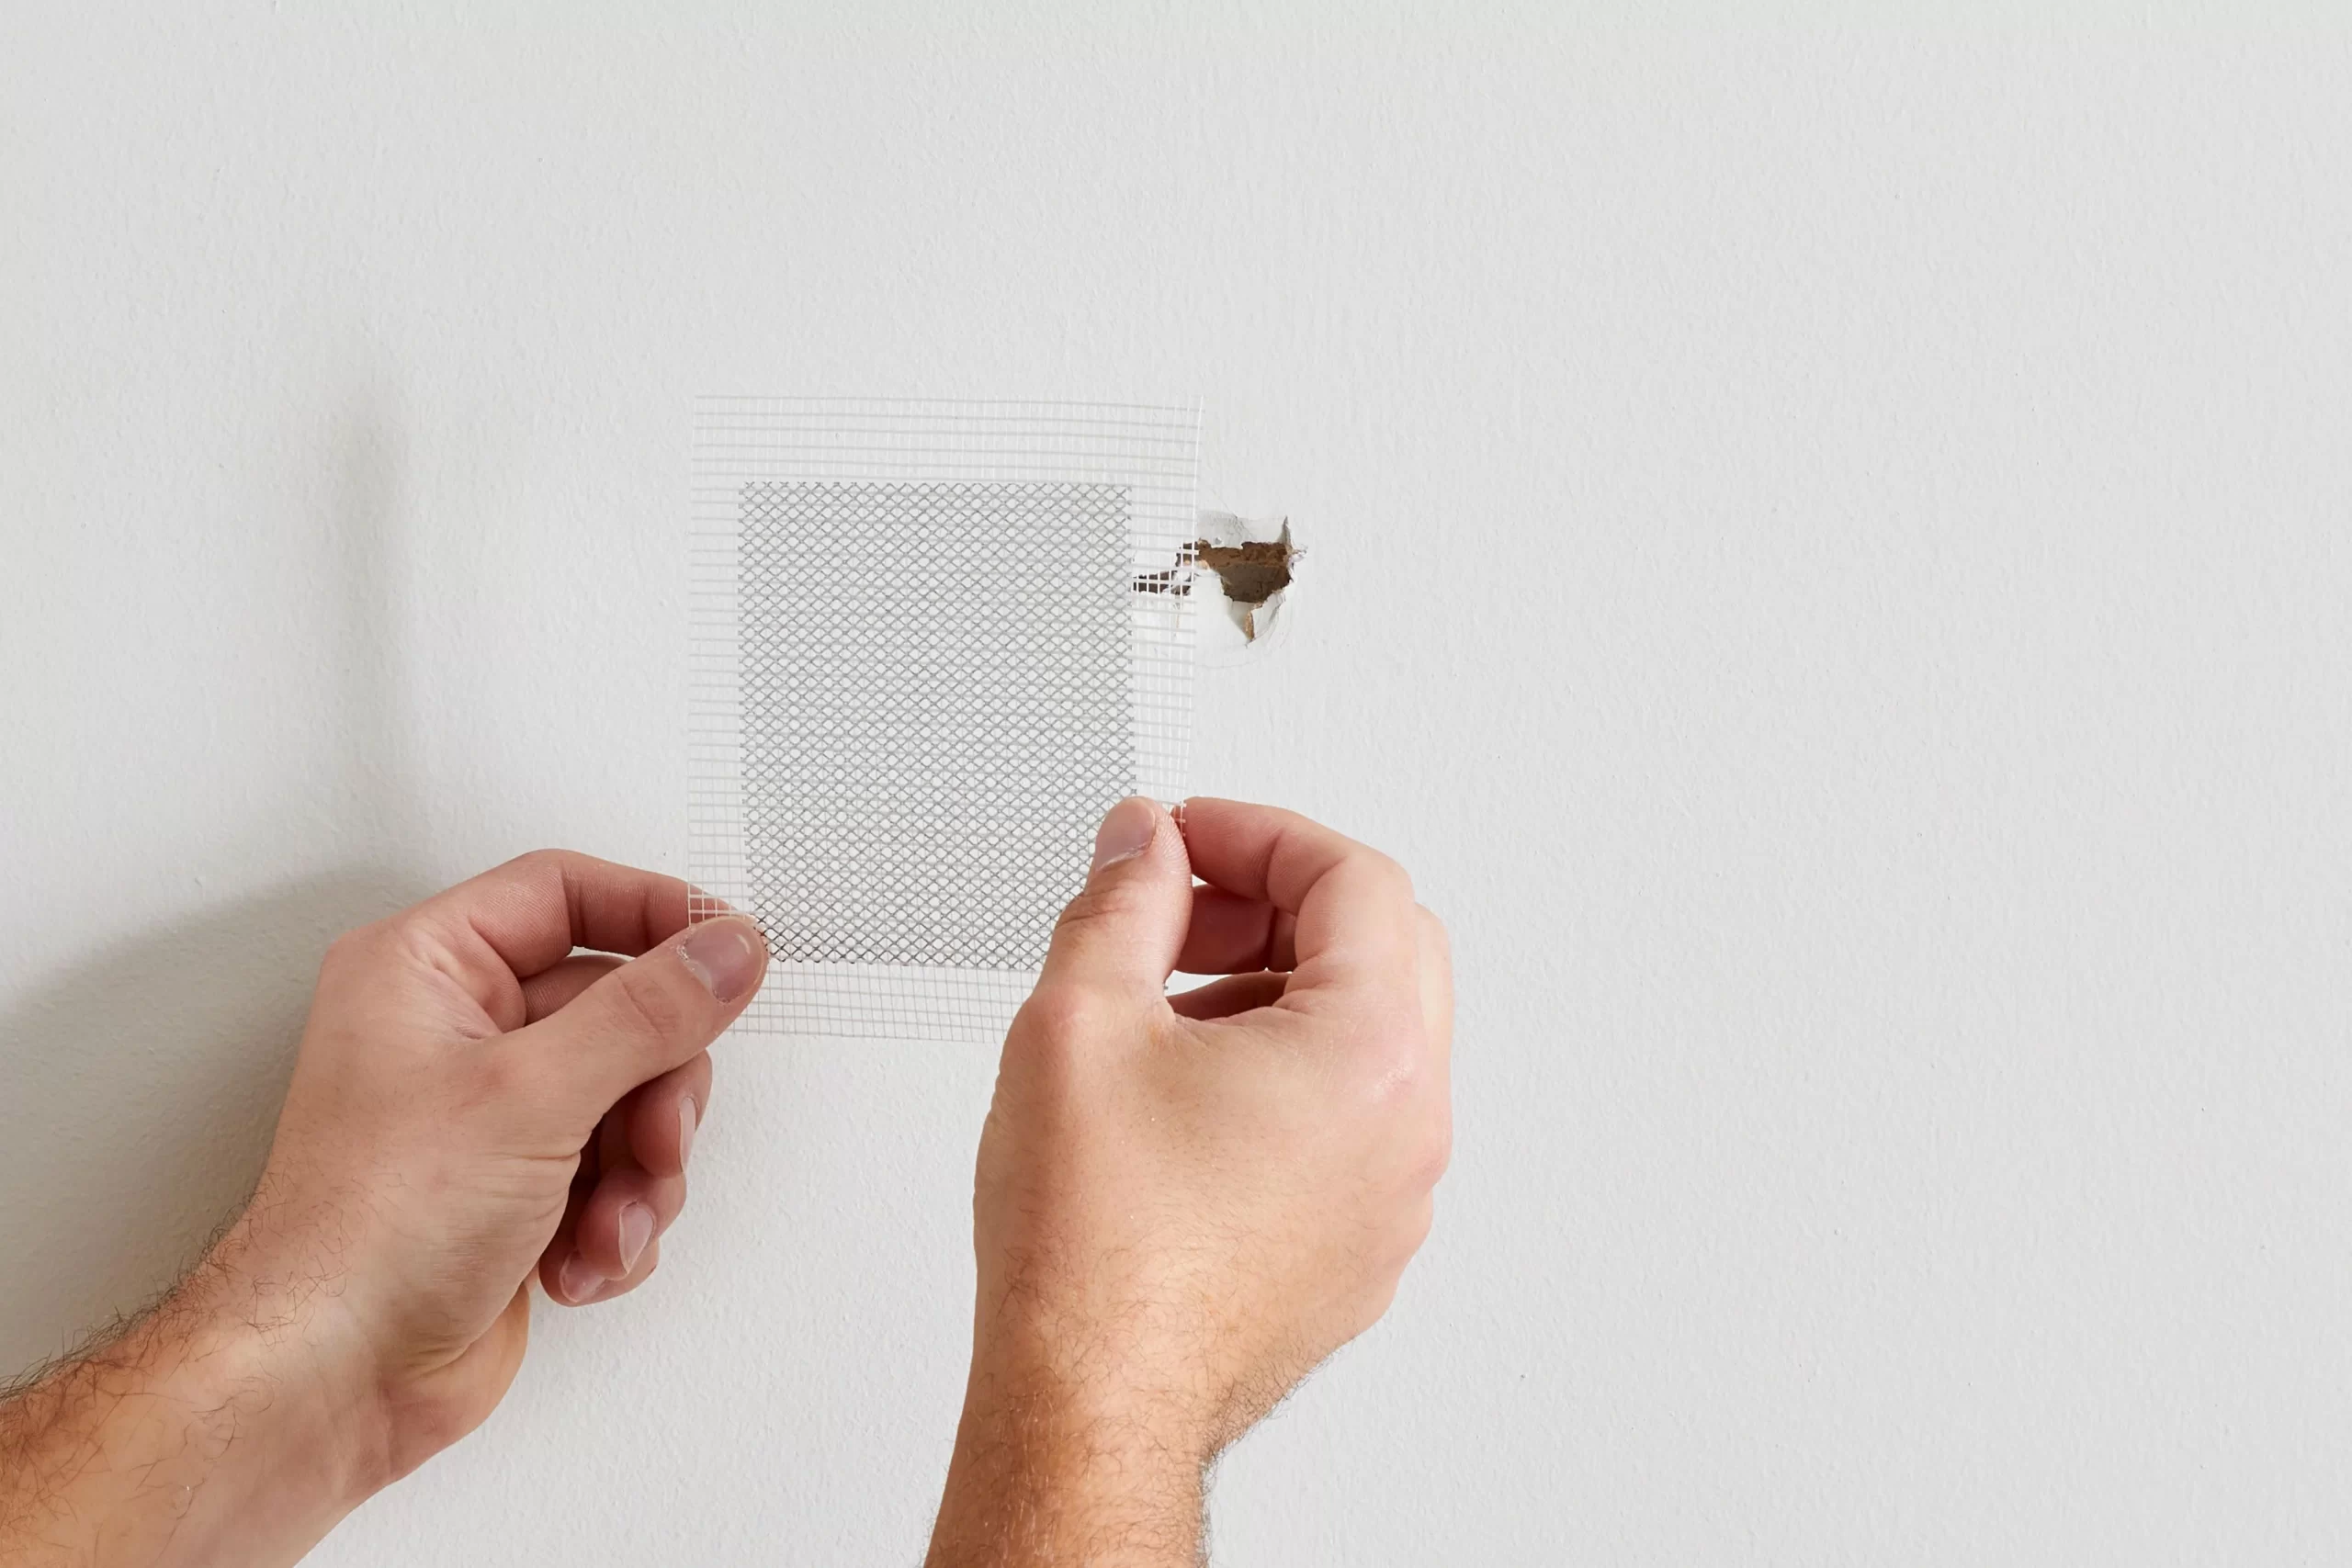
Larger Holes: Applying a Drywall Patch
For larger holes, place a self-adhesive drywall patch over the damaged area. Apply joint compound over the patch, feathering the edges to blend with the wall. Let the compound dry, then apply additional coats if needed for a smooth finish. Sand between coats to ensure an even surface.
Sanding and Preparing for Paint
Once the filler or compound is dry, sand the area gently using a fine-grit sanding block. The goal is to achieve a flat surface that matches the wall’s texture. Remove dust with a damp cloth before moving to priming and painting. Proper sanding is essential for a professional-looking repair.
Finishing Touches for a Seamless Look
Priming the Repaired Area
Apply a primer to the repaired section to seal the surface and improve paint adhesion. Primer also helps prevent differences in sheen between the patched area and the rest of the wall. Use a brush or roller lightly and let it dry fully before painting.
Matching Paint Color and Texture
Match the paint color by using the original wall paint if possible. Dab paint gently on the repaired spot, feathering outward to blend edges. Using paint from the lid rather than dipping the brush fully helps control the amount applied and limits uneven texture. Take your time to achieve an invisible repair.
Properly Rehanging Your Picture Frames
To avoid future damage, consider using Command Strips or other non-invasive hanging solutions for lightweight frames. For heavier frames, use proper anchors to support the weight without enlarging holes. Rehanging the picture carefully maintains wall integrity and prolongs the lifespan of your repair.


")


