


Understanding Bathroom Grout and Its Challenges
What is Grout and Why It Needs Cleaning
Grout is the porous material that fills the spaces between tiles in your bathroom, providing stability and a finished appearance. While it might seem like a minor detail, grout plays a significant role in maintaining the integrity of tiled surfaces. Due to its porous nature, grout tends to absorb moisture, dirt, and soap scum, making it an ideal environment for stains and microbial growth. Over time, if left unchecked, these contaminants can lead to discoloration and deterioration, emphasizing the need for routine and thorough cleaning.
Common Causes of Mold Growth in Bathroom Grout
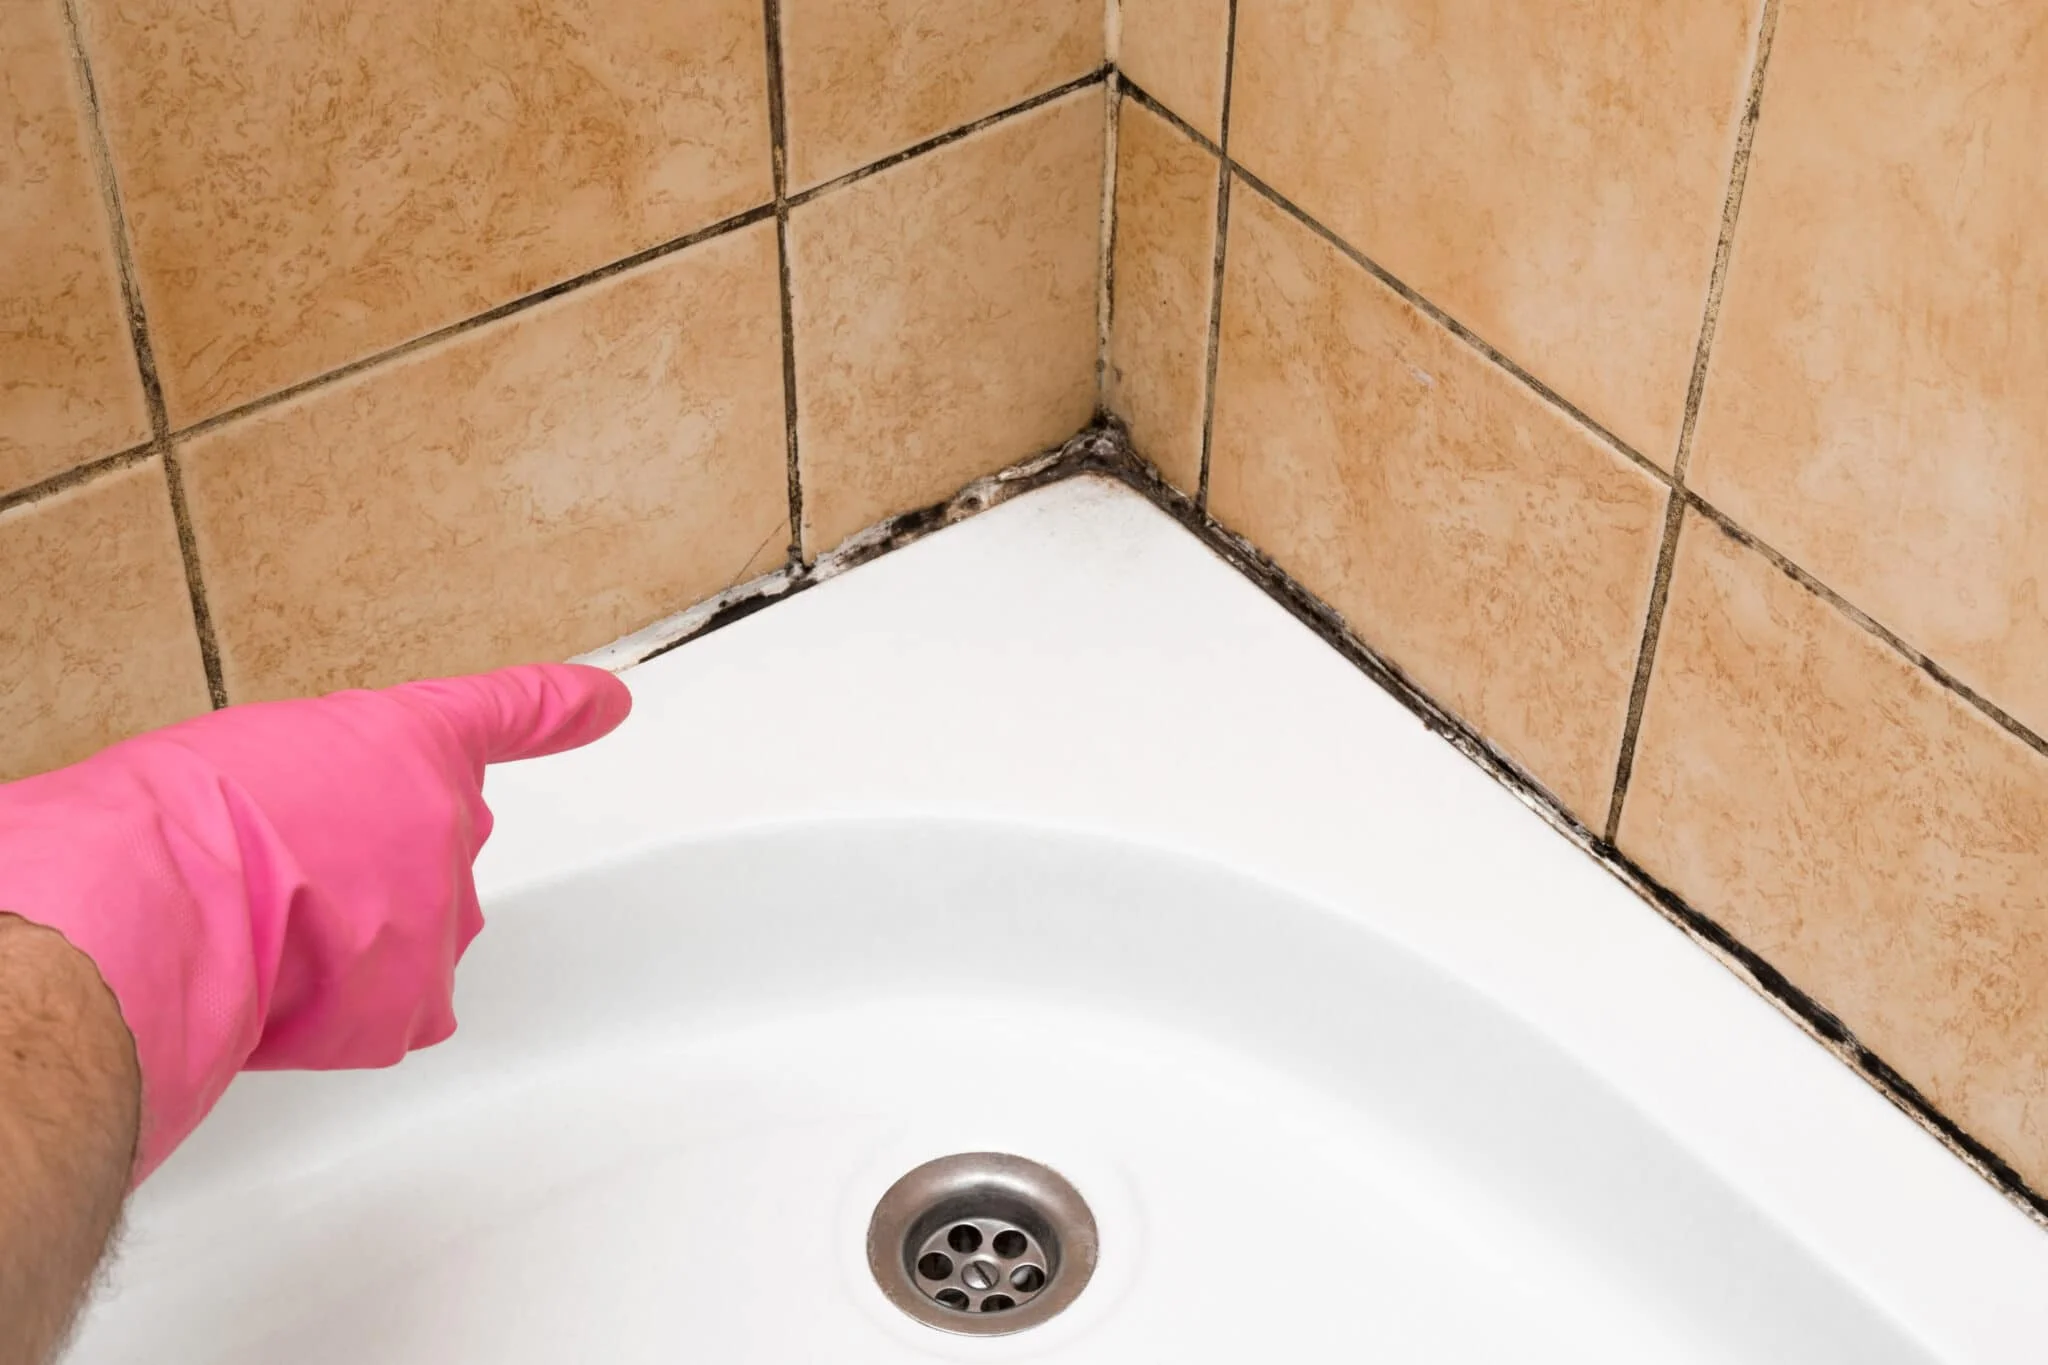
Mold growth in bathroom grout is largely driven by the humid and damp conditions that prevail in this space. Bathrooms often experience poor ventilation and frequent water exposure, which create a perfect breeding ground for mold spores. Soap residues and body oils can also accumulate on the grout, providing additional nutrients for mold. The lack of regular cleaning and the porous texture of grout allow mold to settle deep into the surface, making early intervention essential to prevent extensive mold infestations.
Essential Tools and Cleaning Materials for Grout
Natural vs Chemical Cleaners: Pros and Cons
Choosing the right cleaning agent for your grout depends on your preferences and the level of grime present. Natural cleaners, such as baking soda combined with vinegar or lemon juice, are gentle on grout and environmentally friendly. They work well for mild dirt and light staining but may require more elbow grease for tough spots. Chemical cleaners, on the other hand, are formulated to tackle stubborn stains and mold more aggressively and often offer faster results. However, they can be harsh on grout and may emit strong fumes, making it important to use them with proper safety precautions.
Recommended Brushes and Accessories for Effective Cleaning
The effectiveness of grout cleaning often hinges on the tools used. A grout brush or an old toothbrush is ideal for reaching deep into the narrow lines between tiles. These brushes typically have stiff bristles that can agitate and lift embedded dirt without damaging the grout. In some cases, a small scraper or applicator can help spread cleaning paste evenly over the grout lines. For larger projects, consider wearing protective gloves and eyewear to shield yourself, especially when applying chemical cleaners.
Step-by-Step Process to Deep Clean Bathroom Grout
Preparation: Safety and Area Setup
Begin by gathering all cleaning supplies to streamline your process and avoid interruptions. Remove any removable bathroom fixtures, like soap dishes or shower caddies, to clean them separately. This helps clear the work area and allows you to soak these items if needed. Ensure you wear protective gloves and eyewear, particularly if working with commercial cleaners or strong DIY mixtures. Open the bathroom door and run the ventilation fan to keep the area well-ventilated and reduce exposure to fumes.
Initial Cleaning: Removing Surface Dirt and Stains
First, rinse the grout lines with warm water to loosen surface dirt and grime. Next, apply a mild cleaner or a natural paste made from baking soda and water onto the grout. Let it sit for a few minutes to break down stains. Use a grout brush or old toothbrush to scrub small sections at a time. Working in manageable areas ensures more thorough cleaning and prevents the cleaner from drying out too quickly. Removing surface debris at this stage sets the foundation for a more effective deep clean.
Deep Cleaning Techniques: Scrubbing and Applying Cleaner
For stubborn stains and mold, apply a stronger cleaning solution according to the product’s directions. If using a homemade paste, a mixture of baking soda and vinegar can be effective but use vinegar cautiously as it can damage unsealed grout if overused. Allow the cleaner adequate contact time—following manufacturer recommendations—to disrupt the mold and grime. Use the grout brush to vigorously scrub the grout lines, applying additional cleaner as necessary. Precision here makes all the difference, especially in persistent stained areas.
Rinsing and Drying the Grout Properly

After scrubbing, rinse the grout thoroughly with warm water to remove all residues of cleaner and loosened dirt. Using a sponge or cloth can assist with wiping away excess water. It’s crucial to dry the grout completely afterward as lingering moisture can encourage mold regrowth. Buff any metal fixtures dry to prevent water spots and streaks. Finally, replace any removable fixtures after they are cleaned and dried.
Advanced Tips for Stubborn Mold and Mildew Removal
Using Bleach, Vinegar, and Baking Soda Safely
When confronting particularly resilient mold, bleach can be an effective solution. However, it must be used carefully—never mixed with other cleaners like ammonia or vinegar, as this can produce toxic gases. Apply bleach diluted according to the label, and allow it to sit on the grout briefly before scrubbing and rinsing. Baking soda paired with vinegar works well for light to moderate mold but is less potent against severe infestations. Always prioritize ventilation and protective gear to safeguard your health during these treatments.
When to Consider Professional Mold Removal Services
If mold persists despite thorough cleaning or appears to affect large areas, professional mold remediation might be necessary. Experts can identify hidden moisture issues and apply industrial-grade treatments safely. This is particularly important if you notice mold returning quickly or if you experience health symptoms related to mold exposure. A professional evaluation ensures not only the removal of visible mold but also underlying problems contributing to its growth.
How to Prevent Mold Regrowth in Bathroom Grout
Regular Maintenance and Cleaning Schedule
Consistent upkeep is the key to preventing mold from reappearing in your grout. Schedule regular, light cleaning sessions using mild products to keep dirt and moisture at bay. Sticking to a routine can also reduce the need for intensive deep cleaning. Frequent wiping down and drying of tiled areas after showers or baths helps minimize the ideal conditions mold thrives in.
Improving Bathroom Ventilation and Moisture Control
Controlling humidity is essential to mold prevention. Keep the bathroom well-ventilated by running exhaust fans during and after showers, and by opening windows or doors when possible. Using a dehumidifier can also help reduce moisture buildup in bathrooms that tend to stay damp for long periods. Preventing moisture accumulation deprives mold spores of the environment they need to develop.
Applying Sealants and Protective Coatings
Sealing grout after it has been thoroughly cleaned provides a protective barrier against water, dirt, and mold. There are various commercial sealants available designed specifically for bathroom grout. Applying them according to instructions helps prolong the cleanliness and durability of grout lines. Sealants reduce porosity and make future cleaning easier, contributing to a longer-lasting fresh bathroom appearance.
Conclusion: Maintaining a Clean and Healthy Bathroom Environment
Deep cleaning bathroom grout and preventing mold requires a combination of proper tools, effective techniques, and consistent maintenance. Understanding the nature of grout and the challenges it faces helps you approach cleaning systematically. By preparing adequately, using the right cleaners, and following a step-by-step cleaning process, your grout can regain its original brightness and resist mold growth. Incorporating advanced mold removal methods when necessary and implementing preventative measures like proper ventilation and sealing will safeguard your bathroom’s health and hygiene for the long term.


