


Introduction to Refinishing Hardwood Floors with Minimal Dust
Why Minimizing Dust is Crucial
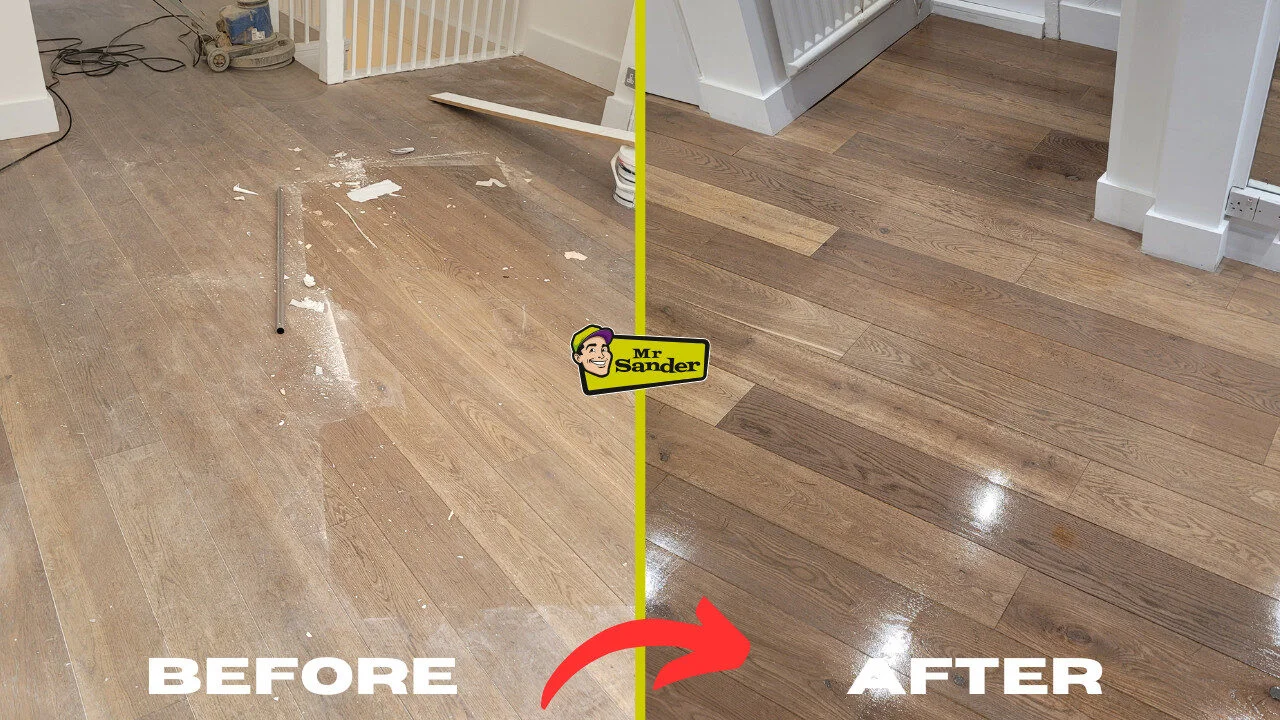
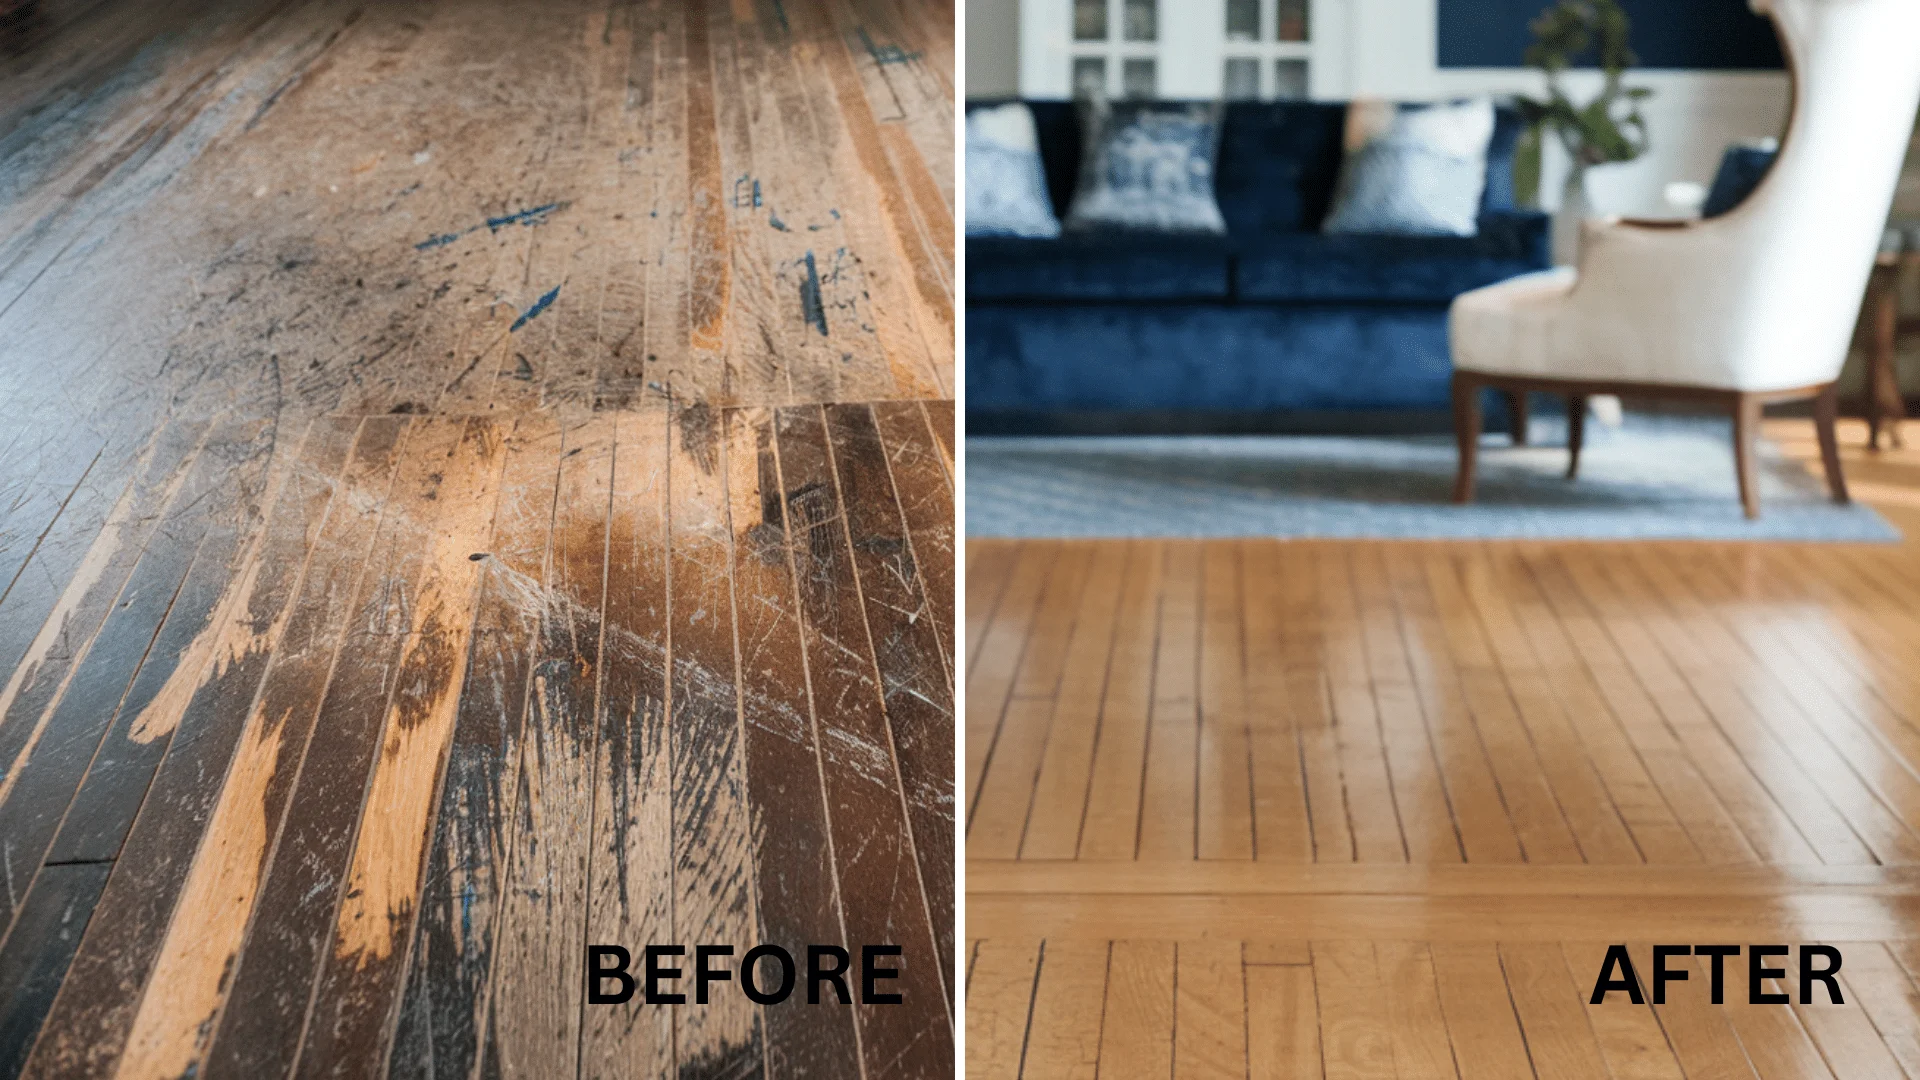
Refinishing hardwood floors is a rewarding project that can transform a home’s ambiance, but it often comes with a notorious side effect: dust. Traditional sanding methods can create a thick cloud of fine wood particles that spread throughout the house, settling on furniture, electronics, and even air ducts. Minimizing dust during refinishing isn’t just about aesthetics—it’s about protecting your family’s health, avoiding a massive cleanup, and preserving your belongings. For example, a homeowner who refinished their floors in a two-story house without dust control found that dust infiltrated the upstairs bedrooms, resulting in a week-long cleanup nightmare.
Overview of the Refinishing Process
Refinishing hardwood floors involves sanding away the old finish, cleaning up the dust, applying stain if desired, and sealing with a protective topcoat. Each step demands careful attention to detail to ensure a smooth, durable, and beautiful result. Using modern dust-containment equipment and thoughtful techniques can help you maintain a clean environment throughout the process, eliminating one of the biggest pain points in floor restoration.
Preparation Before Refinishing
Gathering Dust-Control Tools and Materials
Before diving into sanding, assembling the right tools is essential. Tools designed to capture dust, such as sanders with attached vacuum systems, HEPA-filter vacuums, and dust barriers like plastic sheeting, make a significant difference. For instance, a DIY refinisher who rented a drum sander with a vacuum attachment reported a dramatic drop in airborne dust compared to friends who used traditional sanders without dust collection.
Protecting Adjacent Rooms and Furniture
Even with dustless sanding, fine particles can drift. Protect walls, doorways, and furniture by sealing off work areas with plastic barriers and tape. Removing or covering furniture prevents damage and simplifies cleanup. A practical tip from professionals is to protect the baseboards with scrap wood when you remove the shoe base molding—this prevents accidental gouges and keeps dust from settling in hidden crevices. Labeling each molding piece also streamlines reinstallation, which saves time after the job is done.
Cleaning and Inspecting the Floor Surface
Thoroughly clean the floor before sanding to remove dirt and debris that could clog the sanding belt or cause uneven surfaces. Inspect the floor for nails or staples sticking out, and countersink or remove them to avoid damaging your equipment. Preparation at this stage prevents setbacks during sanding and ensures a smooth finish later.
Dustless Sanding Techniques
Choosing the Right Dustless Sanding Equipment
Investing in the right sanding equipment is key to reducing airborne dust. Drum sanders and edgers equipped with high-efficiency vacuum systems capture most of the dust at the source. Professionals recommend changing abrasive belts on drum sanders every 250 square feet to maintain effective sanding and dust collection. Testing your sanding edger on a scrap piece of wood before starting the job can also help calibrate the machine and ensure it captures dust efficiently.
Proper Sanding Methods to Reduce Dust
Sanding in broad, sweeping arcs rather than back-and-forth motions helps the dust collection system work more efficiently and leads to even wear on the floor. Working in small sections—approximately 3 to 4 square feet at a time—allows you to maintain control over the sanding and minimizes the chance of dust escaping into the air. Being patient and systematic improves the final appearance and keeps your workspace cleaner.
Common Mistakes and How to Avoid Them
One common error is rushing through the sanding process, which can lead to uneven floors and excessive dust. Another pitfall is failing to attach the vacuum system properly or neglecting to empty vacuum bags frequently, causing dust to escape. Avoiding these mistakes requires a mindful, step-by-step approach and routine equipment checks during the project. Remember, frequent breaks to clean the dust path and check the machinery will pay off with a cleaner job site and better results.
Step-by-Step Refinishing Process
Sanding the Floor with Dust Control
Begin with coarse-grit sandpaper to strip the old finish, then progressively move to finer grits for a smooth surface. Throughout, keep the vacuum system running and monitor for any dust leaks. If working around edges where large sanders can’t reach, use an edger with attached dust collection and test it on a scrap board first. Taking these precautions ensures a clean sanding process and optimal dust capture.
Vacuuming and Tack Cloth Cleaning
After sanding, vacuum the floor thoroughly with a HEPA-filter vacuum to capture remaining dust particles. Follow up by wiping the surface with tack cloths to remove fine dust that vacuums might miss. This two-step cleaning prevents dust from interfering with stain or finish adhesion, ensuring a flawless final look.
Applying Stain and Finish
When staining, work on small sections—around 3 to 4 square feet—and apply the stain in the direction of the wood grain for uniform color penetration. Using a lambswool applicator can help spread stain evenly, and storing the applicator overnight in a tightly sealed plastic bag allows you to reuse it the next day without drying out. Once the stain dries, apply your chosen finish evenly with a high-quality applicator, working carefully to avoid bubbles and streaks.
Allowing for Drying Time and Final Touches
Patience during drying is crucial. Rushing to use the floors before the finish fully cures can result in damage or uneven wear. Check product labels for recommended drying times and maintain good airflow in the room without introducing dust. After drying, reinstall the labeled shoe base molding to complete the transformation. Taking your time now ensures your floors remain beautiful for years to come.
Post-Refinishing Cleanup and Maintenance
Effective Dust Removal Strategies
Despite dustless methods, some dust will settle. Use a microfiber mop and HEPA vacuum regularly to keep surfaces clean. Avoid wet mopping for at least a week to protect the finish. Maintaining good ventilation during and after the project helps disperse residual dust and odors quickly.
Maintaining Your Newly Refinished Floors
Protect your investment by placing felt pads under furniture legs and using rugs in high-traffic areas. Clean spills immediately and avoid harsh chemicals that can erode the finish. Routine maintenance includes gentle sweeping and periodic professional polishing to extend the life of your floors.
Tips and Tricks from Experts
Choosing Low-Dust Refinishing Products
Experts encourage selecting stains and finishes formulated for low VOCs and minimal airborne particles. These products not only benefit indoor air quality but often dry faster and provide better coverage. Using these modern products in conjunction with dust-control equipment creates a safer, cleaner work environment.
Scheduling and Time Management for Minimal Disruption
Plan your refinishing project during times when household traffic is low, such as weekends or when family members are away. This reduces dust exposure and prevents accidental damage. Breaking the project into stages over several days can also make the process manageable and less overwhelming. If the scope feels daunting, consider hiring professionals who specialize in low-dust refinishing—they bring experience and equipment that often surpass DIY capabilities.


")