


Introduction to Affordable Wall Art
Why Choose Dollar Store Supplies?
Imagine walking into your living room and instantly feeling inspired by the art that surrounds you. Yet, the idea of purchasing expensive artwork can be discouraging. Dollar store supplies offer a surprising variety of materials to help you create unique, personalized wall art without breaking the bank. From paint sets and brushes to canvases, frames, and decorative paper, dollar stores provide accessible options that encourage creativity. For example, a blank canvas purchased for just a dollar can become a stunning abstract masterpiece with a splash of paint and some imagination.
Benefits of DIY Wall Art
Creating your own wall art transforms your space with meaning and individuality. Unlike mass-produced prints, DIY art reflects your personal taste and style. Beyond cost savings, the process of crafting art can be therapeutic, offering a break from daily stress. Plus, DIY projects provide a sense of accomplishment when you see your finished piece hanging proudly. A friend of mine once transformed her bland hallway into a vibrant gallery wall using just supplies from the dollar store, proving that creativity paired with affordable materials can bring any room to life.
Essential Materials Needed
Top Dollar Store Finds for Wall Art
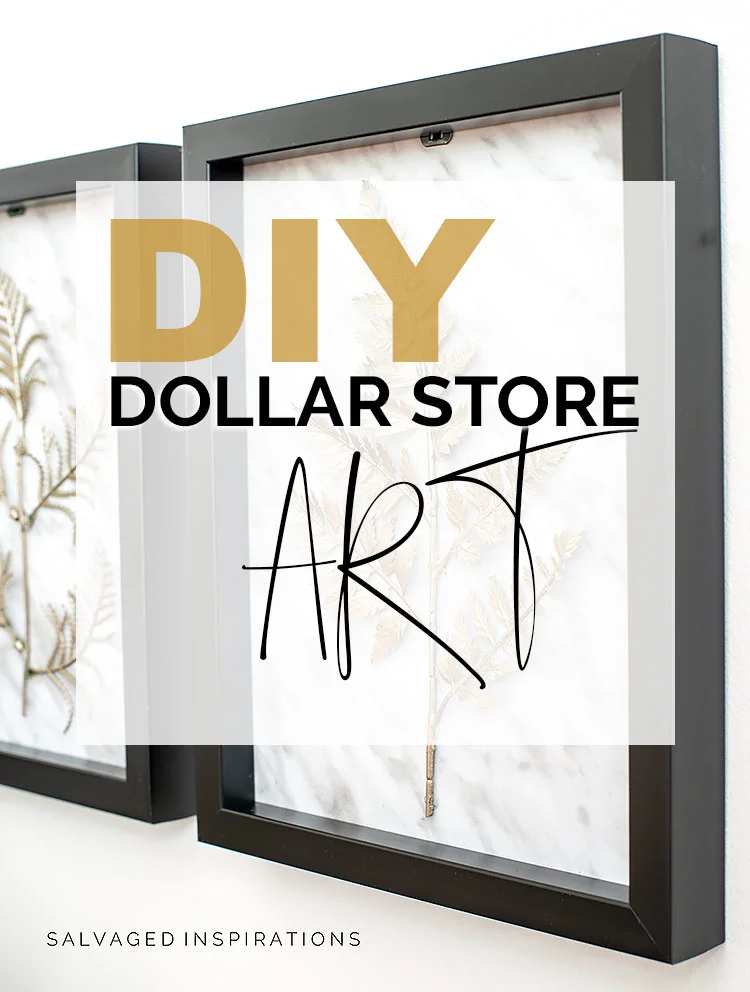
When preparing to create wall art, knowing what to source is key. Dollar stores often carry an array of items perfect for this purpose—think canvases, wooden plaques, framed mirrors, inexpensive brushes, acrylic paints, stencils, and even decorative elements such as artificial leaves or washi tape. One clever DIYer used baking soda combined with paint on plastic cutting mats to create textured, moody pieces with metallic highlights—an effect that looks far more expensive than the materials used.
Watch the Tutorial
Tools to Have on Hand
Having the right tools makes the creative process smoother. Essentials include brushes in various sizes, a palette or mixing surface, scissors, glue or adhesive spray, and old cards or squeegees for adding texture. You may already own most of these, which makes the project even more affordable. Another helpful item is Dollar Tree’s contact paper, which can be used for making faux wallpaper or geometric patterns without permanent alterations to your walls.
Planning Your Wall Art Project
Choosing a Style and Theme
Before buying supplies, consider your personal style and the room’s existing decor. Picking art styles that genuinely make you happy is more sustainable than chasing trends. Look around your space and pull colors from furniture, textiles, or rugs to create harmony. For instance, a neutral living room might benefit from moody abstract pieces in blues and greens, while a vibrant kitchen could sparkle with geometric patterns in bright yellows and reds. This thoughtful planning prevents the common mistake of choosing art that clashes with room colors.
Measuring and Preparing Your Space
Next, measure the wall where you plan to hang the artwork. Understanding the available space helps dictate the size and number of pieces you’ll need. If you want to create a gallery wall, consider arranging multiple smaller pieces in a grid or asymmetrical pattern for dynamic visual impact. Preparing the wall surface by cleaning dust or dirt ensures better adhesion if you use tape or adhesives and avoids damage, especially important if you’re a renter.
Step 1: Gathering and Organizing Supplies
Sorting by Color and Texture
Once your supplies are gathered, sorting them by color and texture can streamline your creative process. For example, grouping paints and papers in a palette of muted earth tones or vibrant primaries can help you easily envision how they will work together. With dollar store items, you might find unexpected textures like plastic mats or wicker pieces that can add dimension. This step helps prevent feeling overwhelmed and supports focused experimentation.
Step 2: Creating the Base
Options for Backdrops and Frames
The base is what your art will build upon. Canvases are classic, but affordable alternatives include wooden plaques, foam boards, or even repurposed thrift store frames that have been refreshed with spray paint. Some DIY artists use white mats inside simple black frames to create a gallery-worthy finish. Another creative option involves painting plastic cutting mats with baking soda paint for a textured backdrop that looks expensive but costs just a few dollars. Consider also using Dollar Tree’s contact paper as a subtle patterned background to add depth without much effort.
Step 3: Designing and Assembling
Simple Techniques for Stunning Results
One of the joys of dollar store art projects is the freedom to experiment with different techniques. Abstract painting, for example, can be as simple as layering various shades of paint and then scraping through with an old credit card or squeegee to create texture. Imperfections aren’t flaws but part of the charm—many artists find that moody, imperfect abstracts evoke stronger emotion than precise designs. Alternatively, you could use washi tape to form geometric patterns or borders, which is easy to adjust or remove if you want to change your design later.
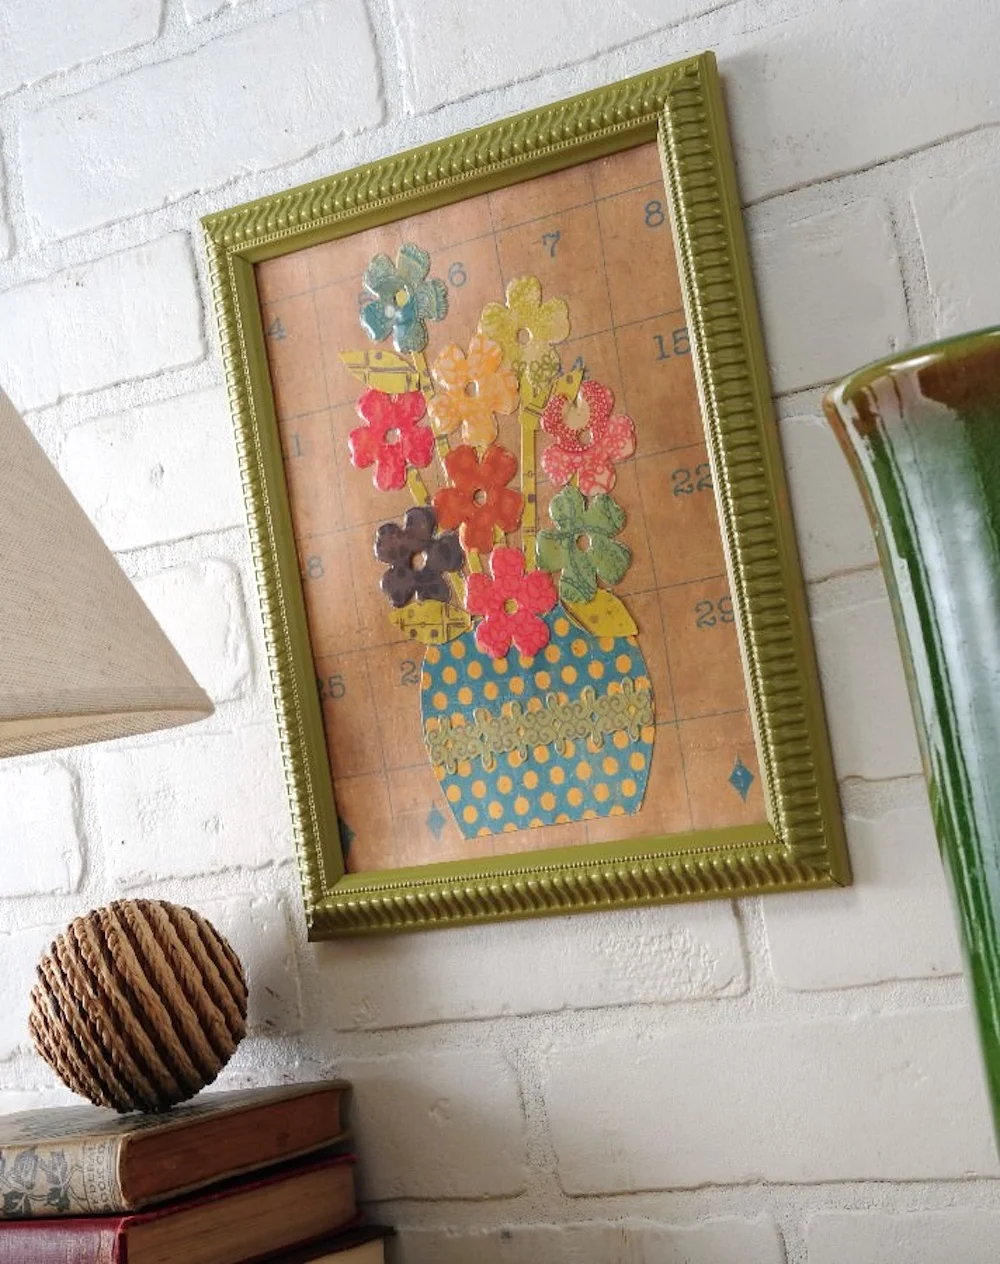
Using Paint, Paper, and Fabric Creatively
Integrating different materials adds interest to your art. For example, applying pieces of decorative paper or fabric scraps onto your base can build rich layers. Pressing leaves or natural elements into wet paint creates unique organic prints. One DIY enthusiast I know created a nature-inspired piece this way, which became a conversation starter in her home. Using inexpensive but visually appealing items available at the dollar store encourages playful exploration of textures and colors.
Step 4: Adding Finishing Touches
Embellishments and Protective Coatings
To elevate your artwork, consider small embellishments like metallic leaf accents or glitter applied sparingly. Once complete, protecting your piece with a clear acrylic spray or varnish guards against dust and fading. If you’ve created multiple abstract pieces, framing them in a cohesive style—like black frames with white mats—can tie everything together neatly. Refinishing thrift store frames with a quick wipe-down and spray paint can give them a fresh, modern look suited for your art.
Displaying Your Artwork
Placement Ideas for Maximum Impact
Where you place your new art can enhance or diminish its impact. For instance, a bold abstract piece works well as a focal point above a sofa or console table, while smaller framed works can fill a hallway or be displayed as a grouped gallery wall. Consider lighting—natural light can reveal textures and colors beautifully, but avoid direct sunlight to prevent fading. Remember, renters can use removable hooks or washi tape to avoid damaging walls while still enjoying their curated space.
Troubleshooting Common Issues
Many shy away from DIY art due to fear of lacking talent, but remember that art is about expression, not perfection. It’s common to make mistakes such as choosing colors that clash with your room or skipping style decisions before starting—these often result in pieces that don’t feel cohesive. Also, renters should avoid permanent changes like nails or paint that can harm the property. If you feel stuck, try looking up public domain art for free printable inspiration or experiment with simple patterns and textures. The key is to keep it fun and stress-free.
Conclusion: Enjoying Your DIY Masterpiece
Creating affordable wall art with dollar store supplies is not only budget-friendly but also deeply rewarding. By thoughtfully selecting materials, planning your style, and embracing the joy of crafting, you can transform ordinary items into extraordinary decor that reflects your personality. Whether it’s a vibrant abstract or a subtle textured piece, your handmade artwork adds a unique story to your home. So gather those dollar store treasures and start turning walls into inspiring galleries that you and your guests will love.


