


Understanding the Classic Yule Log Cake
Origins and Tradition of the Yule Log
The Yule Log cake, or Bûche de Noël, is a traditional Christmas dessert originating from France. It symbolizes the ancient custom of burning a large log to celebrate the winter solstice. Over time, this practice transformed into a cake shaped like a log, decorated to resemble bark and woodland elements. Serving this cake during the holiday not only brings festive charm but also connects us to centuries of celebration and seasonal warmth.
Why Moisture Matters in a Yule Log Cake
A dry Yule Log cake can overshadow its rich flavors and dense textures. Moisture is key to making the sponge soft and pliable for rolling without cracking. It also enhances the overall eating experience, balancing the richness of the chocolate and creamy fillings. Achieving the right moisture ensures the cake stays tender days after baking, maintaining its appeal for holiday gatherings.
Gathering Ingredients for the Perfect Moist Cake
Essential Dry and Wet Ingredients
Start with quality staples: dark cocoa powder for depth and moisture, sifted flour for lightness, and a touch of oil to add richness. Eggs, separated and whipped properly, play a critical role in texture, while sugar balances bitterness. Fresh cream or prepared whipped cream forms the base for luscious fillings and frostings. Each ingredient contributes to the delicate crumb and rich flavor essential for a moist Yule Log.
Choosing the Best Chocolate and Fillings
Opt for high-quality cocoa powder and chocolate, preferably dark and unsweetened, to maintain a robust chocolate flavor without excessive sweetness. When preparing fillings, a cocoa hazelnut whipped cream offers a festive and complementary taste. This filling can be enhanced with Frangelico for an adult twist or kept alcohol-free for broader enjoyment. Balancing the intense ganache with lighter fillings avoids overwhelming the palate and preserves moisture.
Preparing Your Workspace and Tools
Must-Have Baking Equipment
Invest in a 12×17-inch pan to provide enough surface area for the roll, including trimming and decoration. Essential tools include a whisk or electric mixer for whipped egg whites, a rubber spatula for folding batter gently, and parchment paper for easy removal and rolling. Having a damp kitchen towel ready aids in preventing cracks during the rolling process. Measuring cups and a sieve ensure accuracy and smooth dry ingredients.
Tips for Efficient Organization and Cleanup
Organize ingredients and tools before starting to streamline the process. Clean as you go to prevent clutter, which can disrupt batter preparation and increase stress. Using parchment paper lines not only aids rolling but also reduces mess. Plan a dedicated space for cake cooling and decoration to avoid cross-contamination with other holiday activities.
Step 1: Creating the Cake Batter
Mixing Techniques for a Light, Moist Sponge
Begin by whipping egg yolks with sugar until pale and creamy. Temper with oil to introduce moisture from the start. Separately, beat egg whites to stiff peaks to incorporate air. Gently fold the whipped whites into the yolk mixture to maintain volume without deflating. Sifted dry ingredients are folded in carefully to avoid stirring out the air. This method produces an airy yet moist chocolate sponge, essential for rolling without cracking.
Common Mistakes and How to Avoid Them
Over-mixing batter can deflate air bubbles, leading to dense texture. Conversely, under-whipped egg whites reduce sponge lightness. Avoid adding dry ingredients all at once to prevent lumps. Use a gentle folding motion to preserve airiness. Not using enough oil or omitting it entirely can cause dryness. Follow proportions strictly and watch timing to achieve optimal batter consistency.
Step 2: Baking with Precision
Recommended Oven Settings and Timing
Preheat your oven to a moderate 350°F (175°C). Use the recommended pan size to ensure even thickness and avoid edges baking too quickly. Bake the batter for about 12-15 minutes, depending on your oven, until it springs back lightly when touched. Avoid opening the oven door frequently, as this causes temperature fluctuations that can affect rise and texture.
Testing Doneness Without Drying Out the Cake
Perform a gentle spring-back test rather than relying solely on toothpicks, which may dry the cake. The surface should feel firm but not hard. Slight underbaking is preferable to overbaking, as residual heat continues to cook the sponge after removal. This approach preserves moisture and flexibility, making rolling easier later.
Step 3: Cooling and Preparing the Roll
How to Properly Roll the Sponge without Cracking
Immediately after baking, invert the cake onto a parchment-lined towel sprinkled with powdered sugar. Peel off the parchment paper carefully. Using the towel, roll the cake gently from a short edge while still warm. This initial rolling shapes the sponge and prevents cracking by training it to form around the filling. Allow the rolled cake to cool completely before unrolling for filling.
Using Parchment Paper and Damp Towels Effectively
Parchment paper ensures easy release and prevents sticking. The damp towel maintains moisture and softness during rolling, reducing the risk of cracks. Keep the towel only slightly damp to avoid sogginess. This method protects the delicate sponge surface and makes handling more manageable, especially for an advanced recipe like this.
Step 4: Crafting the Filling and Frosting
Recipes for Moist, Flavorful Fillings
Whip cream with cocoa powder and sweeteners until soft peaks form to create a fluffy cream filling. Adding hazelnut paste enriches and balances the chocolate flavor. For a boozy note, lightly incorporate Frangelico liqueur. Keep the filling chilled for stability, which aids in spreading and prevents the cake from becoming soggy.
Techniques for Smooth and Creamy Frosting
Ganache made from dark chocolate and cream provides a rich finish. Allow ganache to cool to room temperature before whipping to incorporate air and achieve a spreadable consistency. Avoid overheating as this can separate the mixture. Smooth application requires chilled cake for the frosting to set properly and hold decorative textures resembling tree bark.
Step 5: Assembling and Decorating Your Yule Log
Layering and Rolling for Structure and Moisture
Unroll the cooled sponge carefully and spread a generous layer of filling. Re-roll tightly without squeezing filling out. Wrap the assembled log in plastic wrap and refrigerate until firm, typically a few hours or overnight. This resting period allows flavors to meld and moisture to distribute evenly, ensuring a tender bite.
Creative Decoration Ideas for a Festive Finish
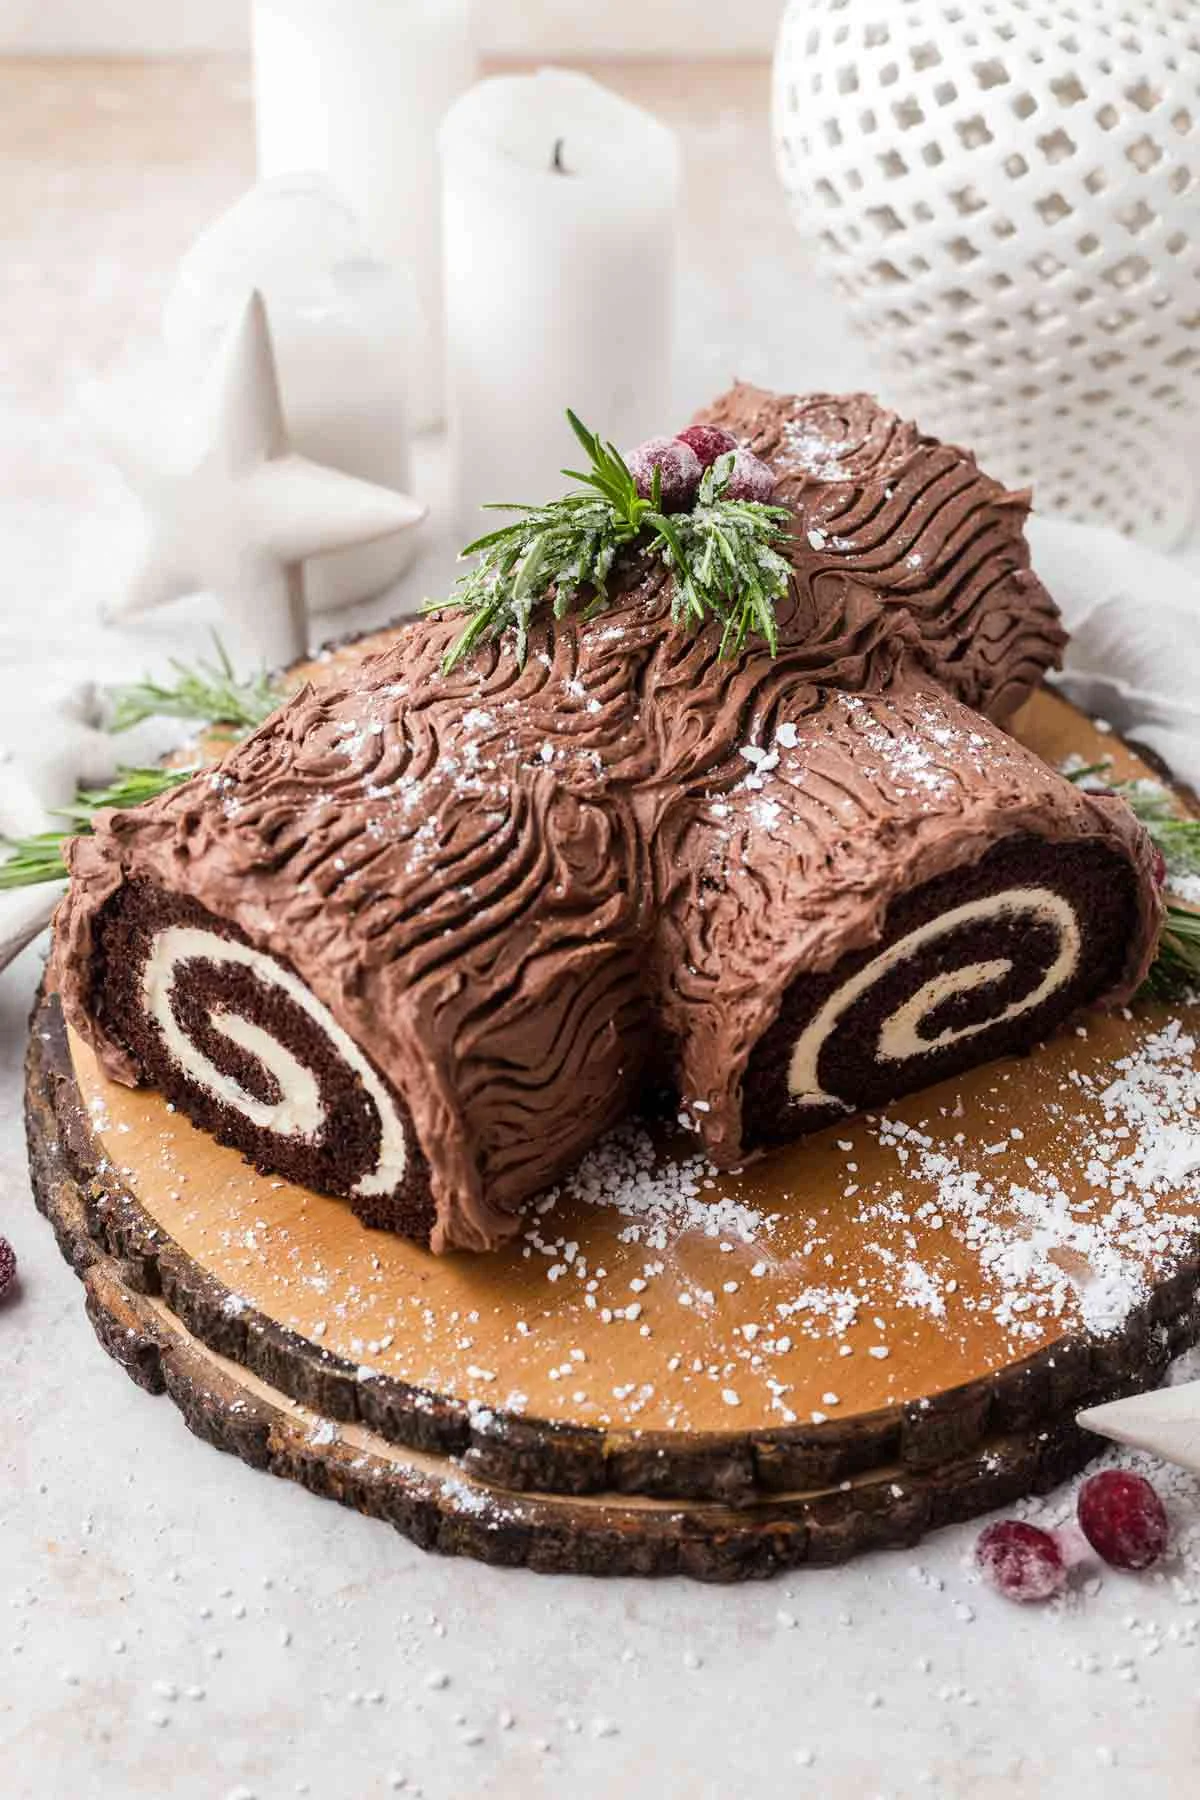
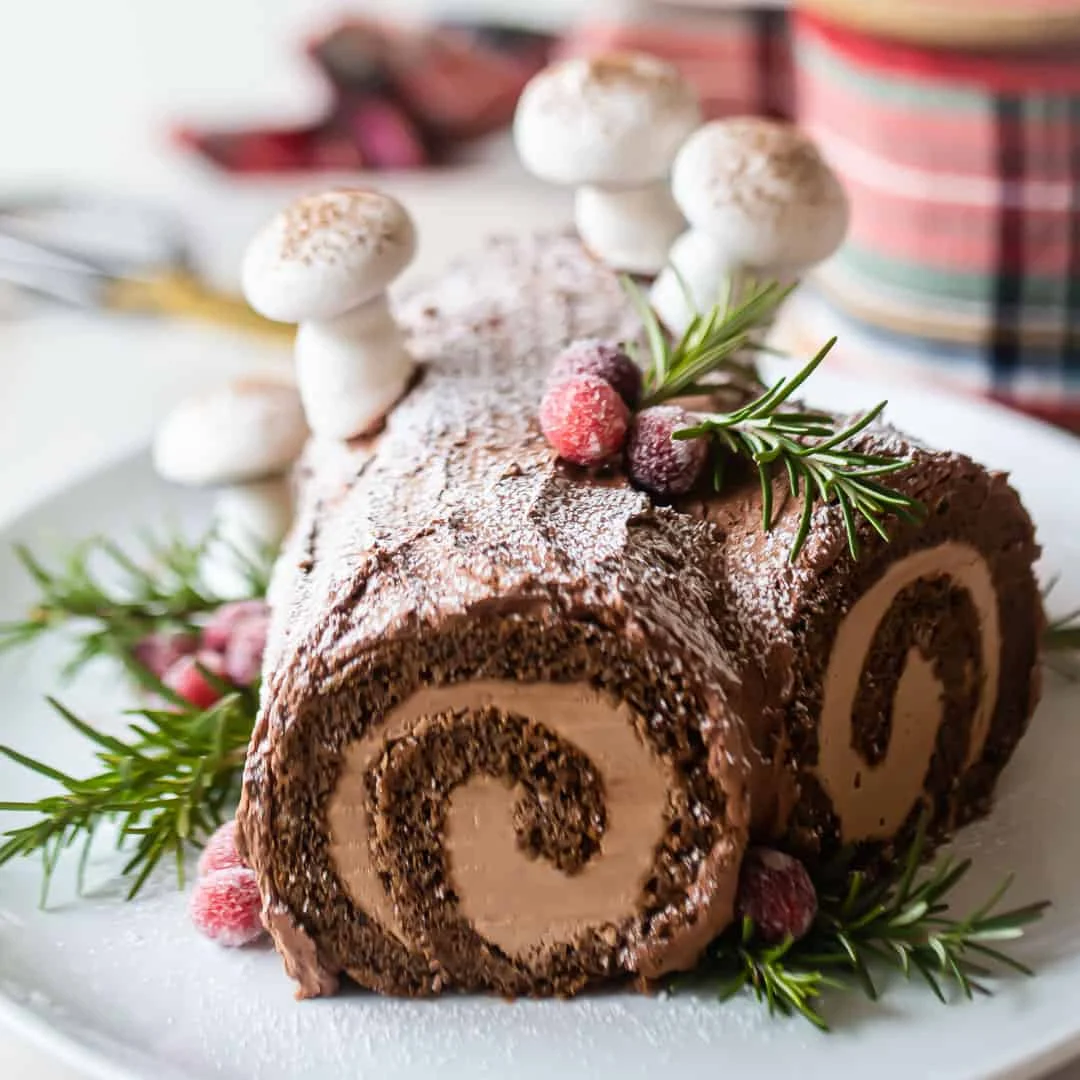
Decorate with piped or textured ganache to mimic bark. Garnishes such as mushroom-shaped meringues, sugared cranberries, and sprigs of rosemary add a natural woodland look. A small piece of cake offcut can be attached as a branch. These elements contribute visual interest and enhance the seasonal theme of the dessert.
Tips and Tricks for Maintaining Moisture Throughout
Storage Solutions to Keep Your Cake Fresh
Wrap the Yule Log tightly in plastic wrap after decorating and refrigerate. Remove from the fridge 30 minutes before serving to restore softness. Avoid leaving the cake uncovered, as it dries out quickly. For longer storage, freeze the log wrapped in multiple layers, thawing overnight in the fridge before serving.
Adjustments for Humidity and Altitude Variations
In humid environments, shorten baking time slightly to prevent sogginess. Use less liquid or oil at higher altitudes as moisture evaporates faster. Adjust oven temperature by increasing it slightly and monitor the baking process closely. These tweaks help maintain the delicate moisture balance critical for the cake’s texture.
Final Touches and Serving Suggestions
Plating Ideas for Holiday Presentation
Place the decorated Yule Log on a festive serving platter with powdered sugar “snow” sprinkled around. Complement with fresh cranberries or holly sprigs for color contrast. Slice carefully with a serrated knife to preserve the spiral design inside. Small dessert plates with gold or red accents elevate the holiday experience.
Pairing the Yule Log with Beverages and Sides
Serve alongside mulled wine, rich hot chocolate, or coffee to balance the cake’s sweetness. Light fruit compotes or candied nuts add texture contrast. Avoid overly heavy sides that might overshadow the cake’s moist and tender character, allowing the Yule Log to remain the centerpiece of the dessert table.


")


